My journey to find spelt – and subsequently make spelt rolls – has been a global one. While I had some spelt flour sitting in my cupboard for a while, I had very little idea what to do with it. Then, from an unexpected discovery in a distant land, inspiration struck. This is the story of why butter spelt rolls became an absolute necessity.
the Story
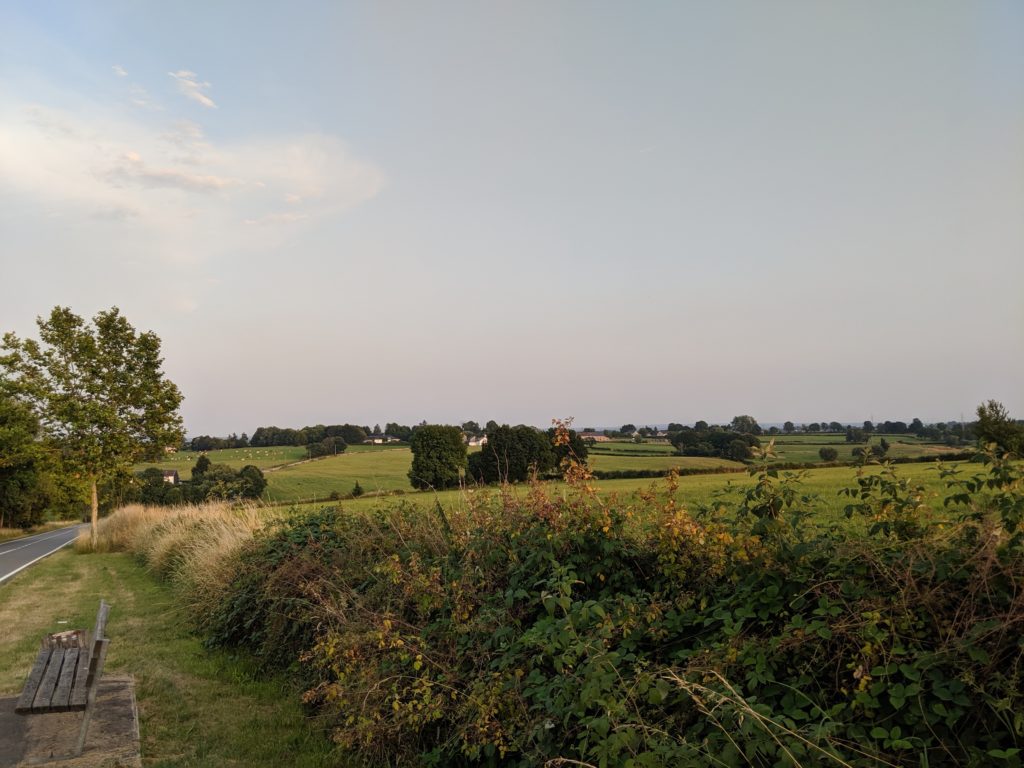
Last summer, I took a few extra days after a festival in Germany to hang out in Belgium and the Netherlands with a friend. We spent our evenings staying at an idyllic, updated farmhouse (from AirBnB) in the rolling Belgian countryside and our days touring different towns nearby.
During a day trip to Maastricht, we randomly stumbled across De Bisschopsmolen (The Bishop’s Mill). This little gem has a working millstone inside and a big water wheel in the back. The front is a sort of unprepossessing doorway that you’d likely miss if not looking for it.
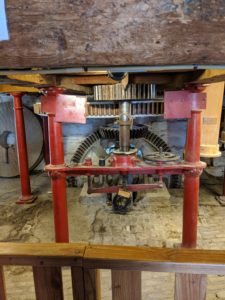
The Bishop’s Mill is the oldest working watermill in Holland, built in the 7th century. It was once the only mill from which all brewers would get their malt milled. Now, in addition to allowing visitors to see the mill operating, they have a cafe and a taproom where you can enjoy the fruits of their labors. There’s even a bed & breakfast as part of the works (read: new life goal).
The cafe offers many delicious creations but I decided to try the Appel Notenvlaai (Apple Pie with Nuts). The crust was delicate, if thicker than what I’d usually expect. The lattice work on top is larger than most.
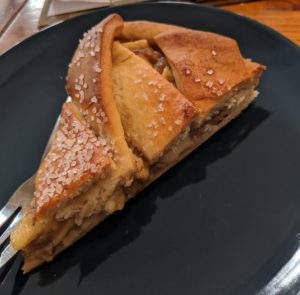
One little twist – it’s a 100% spelt bakery!
It was a revelation for me. The breads I tried were delicious and a little nutty. The pastry for the pie was flavorful (not just tasting of butter). I knew then that I had to try baking with this fantastic, ancient grain. Conveniently, De Bisschopsmolen offers a whole recipe section on their website.
What is Spelt?
Spelt is a species of wheat that predates modern wheat used for most baking. The nutritional content is therefore pretty similar to wheat. It does contain gluten, making it useful in most bread and other recipes which require gluten development. That said, the gluten in spelt is more delicate. It can be more easily overworked if kneaded too much. While refined spelt flour is available, most popular companies produce only whole or sprouted spelt flour, making it easiest to swap for whole wheat flour in recipes.
The Recipe
Prior to trying this recipe, my only experience working with spelt was in Ezekiel bread (I’ll post a recipe for that after more testing for a good one). It was a little intimidating hearing that spelt gluten can be overworked. So I stuck rather closely to the recipe here.
For this first attempt at using solely spelt, I chose the Roomboter Speltbroodjes (Butter Spelt Rolls). Partly this is because they sounded delicious and partly it was because the recipe was easiest to translate from Dutch. I also decided that 30 rolls was a bit much for a first batch so the amounts listed in my version are actually a half batch.
the Process
the Dry Ingredients
First off – spelt flour for spelt rolls. Seems obvious. This uses only spelt flour, no AP or bread flour mixed in at all. Into this, add the salt, sugar, and instant yeast. Other than making sure that the salt is added in to the opposite side as the yeast, that’s about as easy as it gets.
the Wet Ingredients
The wet ingredients are only slightly trickier. All must be left out to come up to room temperature. This includes the butter, milk, and egg. Since there is no water used, it is crucial that the milk be at room temperature in order for the yeast to activate. Equally, the butter should be at room temperature to achieve the correct consistency when mixed. Just before you start the mix, lightly beat the egg.
The original recipe called for the use of fresh yeast… but I don’t have that. I did the calculations and used instant yeast instead. The result seemed just fine.
the Mix
Add the dry ingredients to the bowl of the stand mixer with the salt to one side and the sugar in the middle. Then add the instant yeast to the side opposite the yeast. Use the dough hook on low speed to start incorporating the wet ingredients. I started by first adding the butter in approximately tablespoon-sized chunks. Then added the egg. Last, I added the milk a little at a time. To my surprise and delight, the dough looked just about perfect with the measurements of ingredients.
Hang on to the wax paper wrapper of the butter. That way you can use it to grease the baking sheet and the rising bowl.
the Knead
You start out slow in the mixer and then increase the speed just a little. This helps to get the ingredients incorporated before working on gluten development. Because the gluten in spelt is more delicate, the mix does not take long and should not be done at very high speeds. The resulting dough is absolutely gorgeous in texture. Soft and silky.
It was at this stage that I messed up a little. My usual M.O. is to do the last bit of kneading by hand. So I turned out the beautiful spelt roll dough onto a lightly floured surface… which promptly ruined the delicate balance of wet and dry ingredients. It wasn’t awful, but it definitely lost something. Note for next time – either oil or nothing on that surface.
the Bulk Rise
Use the wax paper wrapper from the butter to grease a large bowl. Don’t use all of the remaining butter on it. You can spread some of it around with a paper towel to get good coverage. Then place the dough in and cover with plastic wrap.
Since I got a snazzy new collapsible proofer for the holidays, I used that to keep the dough at 80F / 27C. The original recipe called for a shorter proof – only 30 minutes. When I checked at that point there was very little rise. Maybe a result of the use of instant yeast rather than fresh? Anyway, I let it rise another 30 minutes or so (total of an hour) to really expand.
the Shape
The first step of the shaping process was to use the butter wrapper to grease a standard 9 x 13 in (23 x 33 cm) baking dish. This way all of the fats are the same throughout in case any transfers to the spelt rolls. It’s also helpful to use butter or something with a similarly-high smoke point as this will bake at a relatively high temperature.
Given that this is a half recipe, the dough is meant to divide into 15 svelte spelt rolls (see what I did there?). After a light punch-down, I weighed the full dough ball and then started measuring up my pieces. It came out pretty even thanks to my trusty kitchen scale. Roll into ball shape using the dry counter and place, seam side down, into the greased baking dish.
the Proof
Cover the spelt rolls in their baking dish with a tea towel and allow to rise for at least 30 minutes. I think mine was about 45 due to being on conference calls. They puffed up a little but, again, not as much as I’d have normally expected. Room temperature was somewhere around 72-74 F (22-23 C) for this proofing.
the Bake
Preheat the oven to 480F / 250C.
Brush with an egg wash just before baking. To be honest, I forgot this step at first. I had to grab the spelt rolls out of the oven a minute or so into the bake to add the egg wash. It was well worth it and did not seem to effect the bake much.
Total bake time is about 10 minutes. The spelt rolls will have a fair bit of oven spring, making them more roll-sized when done.
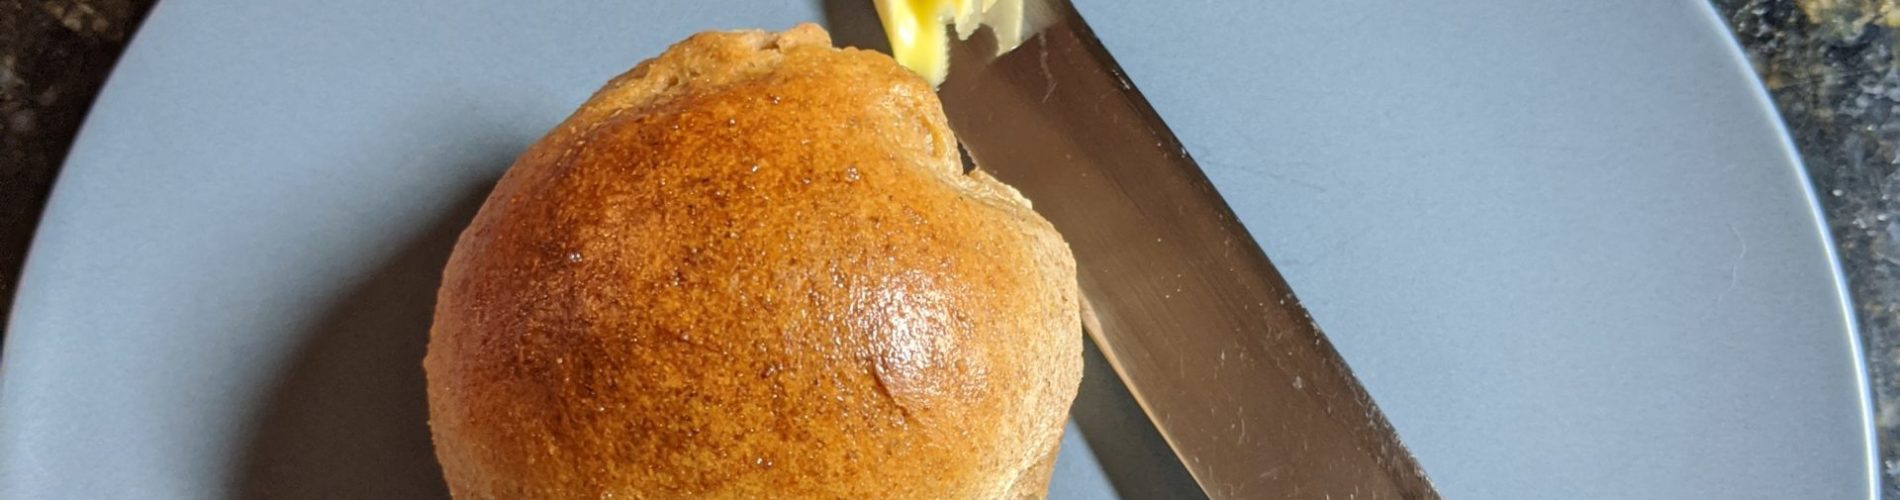
the Finished Spelt Rolls
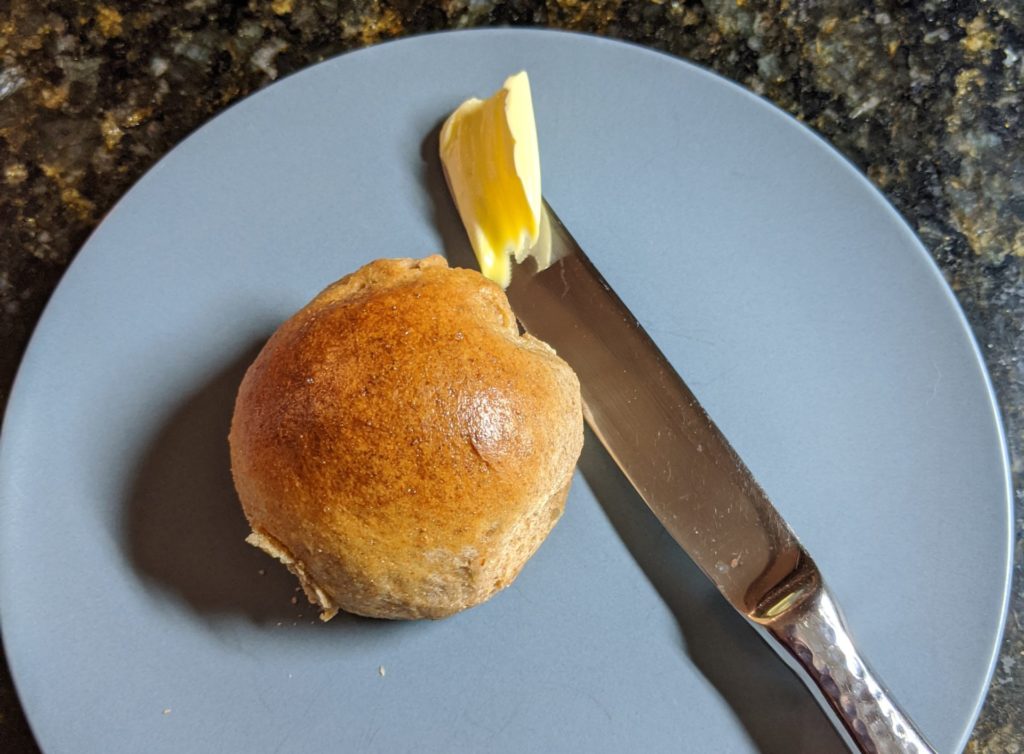
The finished spelt rolls were a honey brown with a somewhat coarse texture, not unlike whole wheat rolls. I wish I had gotten a picture of them right out of the oven but I wasn’t really thinking of grabbing my camera with them scent of them wafting through the house.
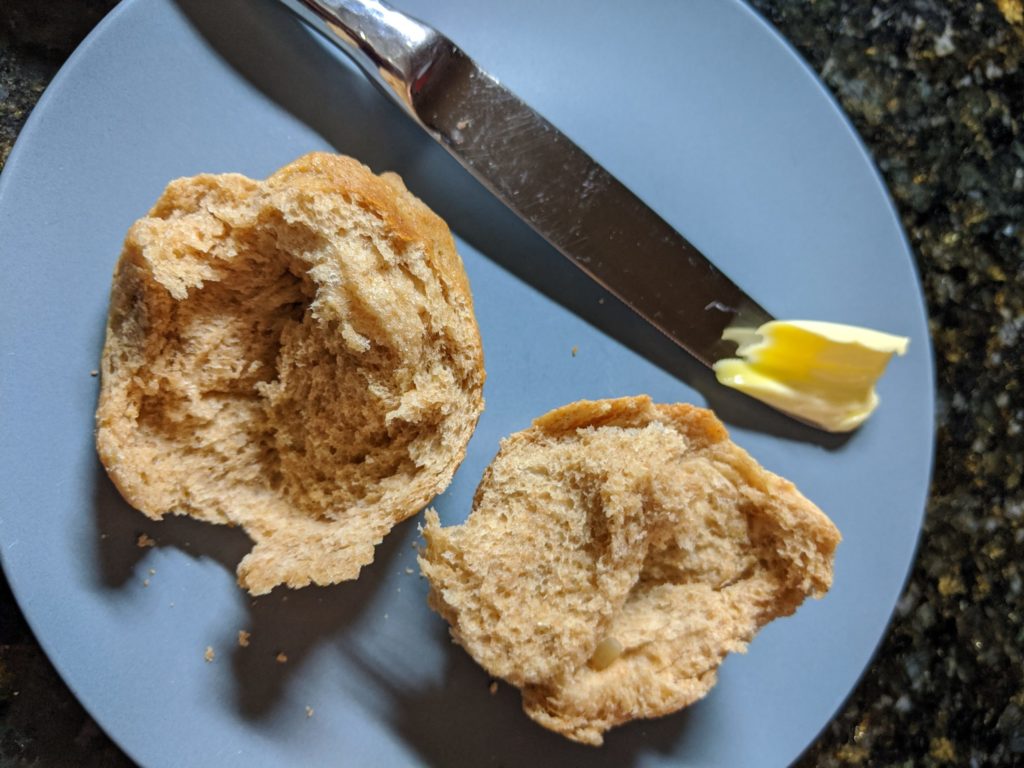
The crumb was relatively tight and even. When torn open, any prior seams from the shaping became natural fault lines.
I was in a bit of a rush to get these out of the oven before leaving on a trip. With not quite an hour to spare, I got them done and, I must admit, ate three of them.
my Notes for Next Time
- The dough was perfect coming out of the stand mixer. When hand-kneading, use either a dry counter or a greased surface to keep that texture.
- Thinking back on it, I don’t know if I actually did cover the dough with plastic wrap for the bulk rise. It came out a little dry on the outside, which makes me think I hadn’t done so. That would help retain the limited moisture that is in the dough.
- Proofing for longer may help make the rolls fluffier. While the crumb was still good, I was looking for more loft.
- I’d love to try these as a sourdough, either using my existing sourdough starters (likely the whole wheat one) or creating a spelt sourdough.
Butter Spelt Rolls
Equipment
- Stand mixer
- 9×13 baking dish
- Large mixing bowl
- Plastic wrap
Ingredients
Dry Ingredients
- 500 g spelt flour
- 8 g instant yeast (could use 1 packet instead)
- 25 g sugar
- 10 g salt
Wet Ingredients
- 100 g unsalted butter (or 1 stick)
- 1 egg lightly beaten
- 175 ml whole milk
Egg Wash
- 1 tbsp water
- 1 egg
Instructions
- Let all wet ingredients (butter, eggs, and milk) come to room temperature
- Place spelt flour, salt, sugar, and yeast in the bowl of the stand mixer with the dough hook attached. Be sure that the salt and yeast are on opposite sides of the bowl.
- Turn the mixer on slow to start combining dry ingredients
- Add butter in chunks to the dry ingredients and allow to incorporate a little. Keep the butter wrapper for later use.
- Add beaten egg and then add milk a little at a time until all is incorporated
- Mix on low for 4 minutes then increase to medium-low for an additional 6 minutes
- Turn out on a dry counter and hand-knead approximately 30 seconds or until smooth and satiny
- Use the butter wrapper to lightly grease the large mixing bowl
- Place the dough into the greased mixing bowl and cover with plastic wrap. Allow to rise in a warm place for 30-60 minutes. The dough may not double in size but should increase somewhat.
- Use the butter wrapper to lightly grease the 9×13 baking dish
- Turn out onto a dry counter and lightly flatten
- Weigh the dough and divide into 15 even pieces by weight
- Roll into ball shapes and place evenly in baking dish (3×5 rolls)
- Cover with a tea towel and allow to proof 30-45 minutes
- Preheat oven to 480F / 250C
- Beat egg and water together to form an egg wash and brush over the tops of the rolls
- Bake 10 minutes